How To Assemble And Use Victorio Steam Canner
Views: 403
If you’re thinking about switching from boiling water bath canning to steam canning, you’ve probably heard of the VKP steam canners, also known as Victorio steam canners. Why probably? The reason is that at the time of this writing, VKP brands (Victorio Kitchen Products) is the only manufacturer in North America that makes this handy canning gadget. Whether you’re tired of lugging around that heavy water bath canner or you’re all about a more budget-friendly way to can, steam canners are worth considering. These were the top reasons why we just had to try out the VKP steam canner. And just so you know, the canner we’re talking about in this post was bought with our hard-earned cash. No sponsorships here, just the honest, unbiased take of two seasoned canning enthusiasts on the FruitSaver steam canner by the VKP Brands.
Fun fact: you might come across these canners labelled as VKP Brands, Victorio Kitchen Products, Victorio Brands or Kitchen Crop steam canners. While this might seem confusing, we can say with certainty, that they all refer to the same manufacturing company and the same line of canners.
What is a steam canner?
A steam canner, also known as atmospheric steam canner, is a type of canner that uses pure steam to preserve food stored in canning jars. Unlike traditional water bath canners or pressure canners, which use either boiling water or steam under pressure respectively, a steam canner operates by using hot steam in an open atmosphere.
Unpacking brand new FruitSaver steam canner
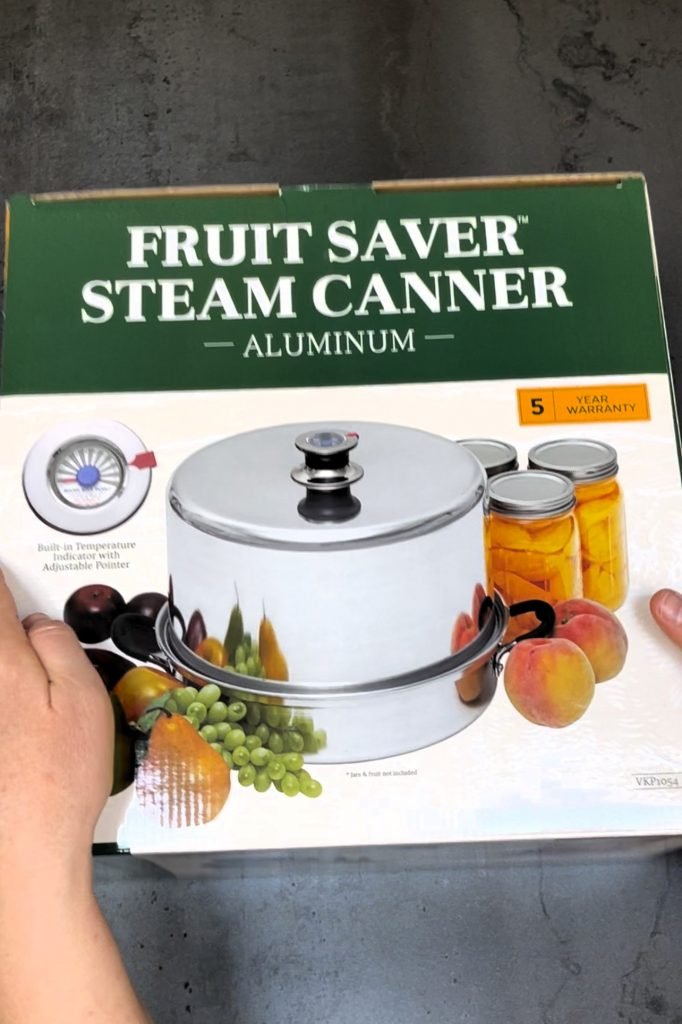
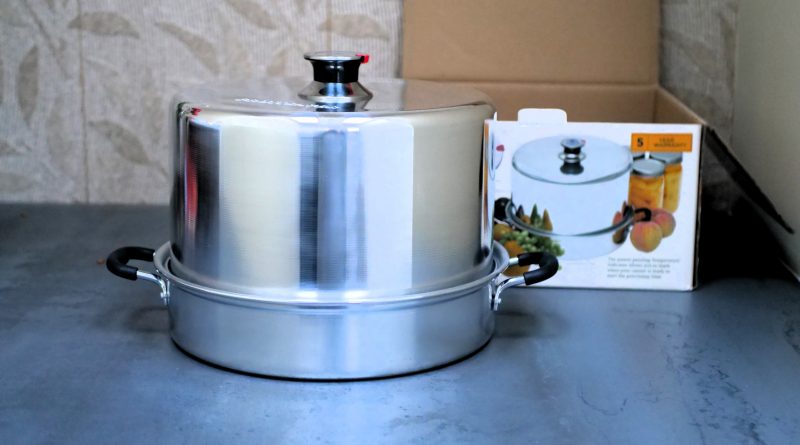
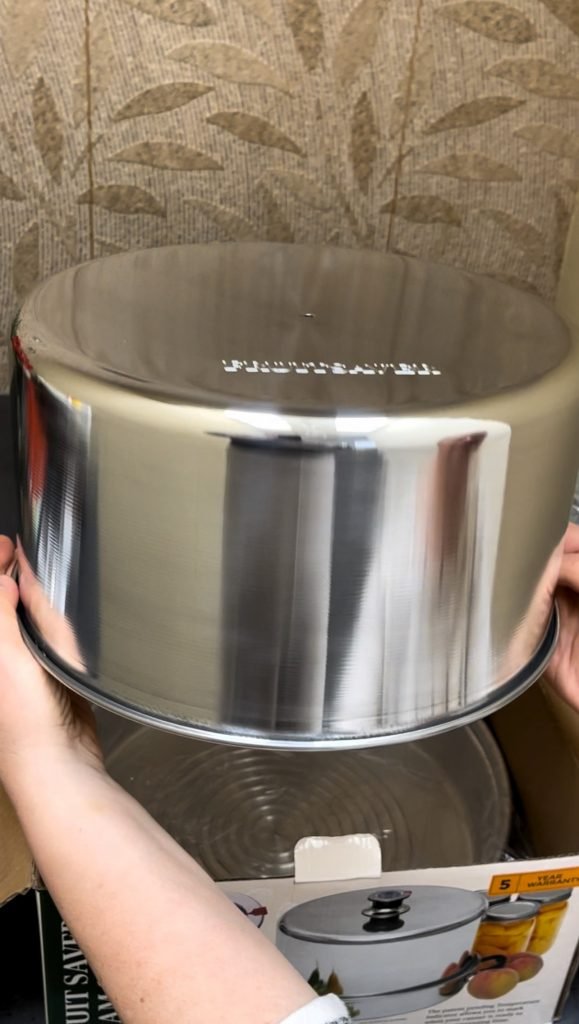
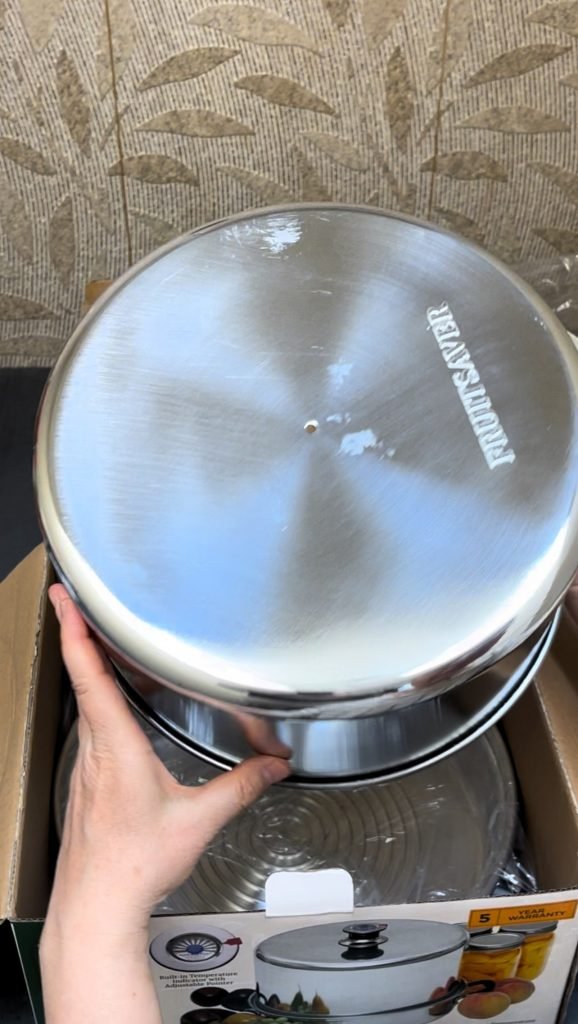
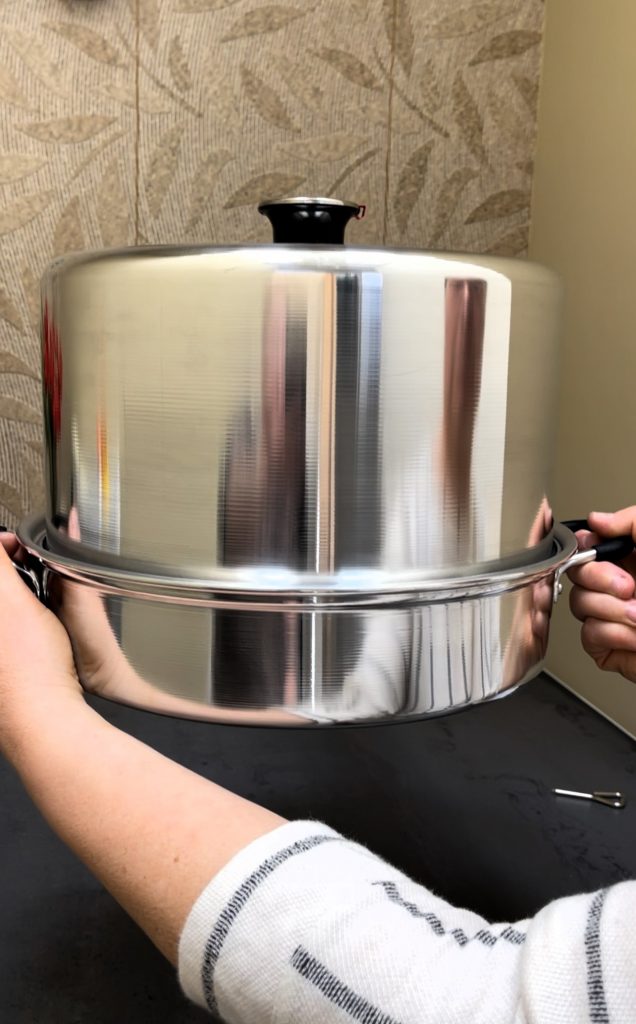
Have you seen a steam canner before? If not, get ready for a surprise! It is not your usual pot with a canning rack and a lid. It looks more like a cloche in fancy restaurants than a utilitarian canning tool. Additionally, the FruitSaver steam canner is made of lightweight aluminum, which isn’t what you’d normally expect from a canner.
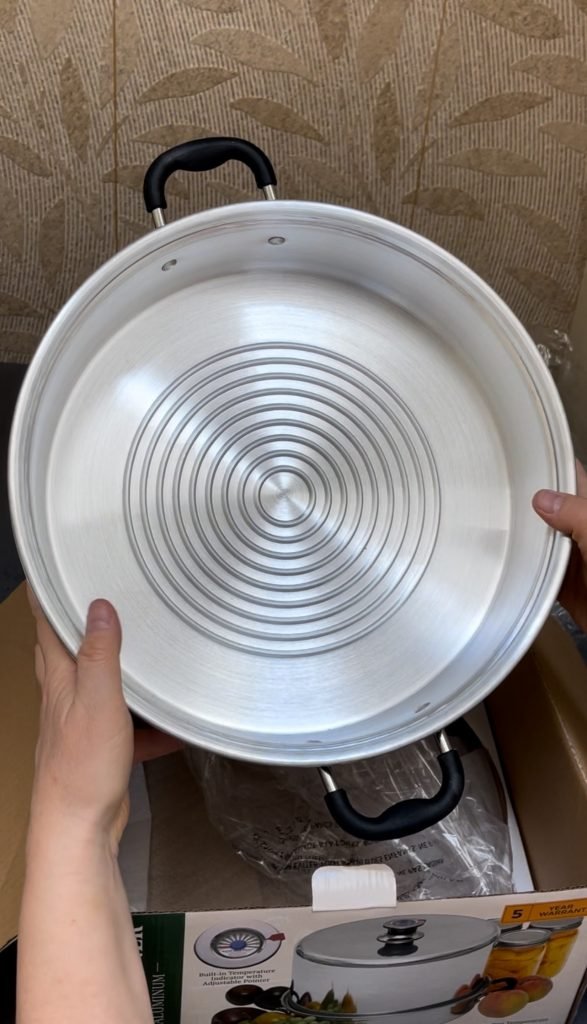
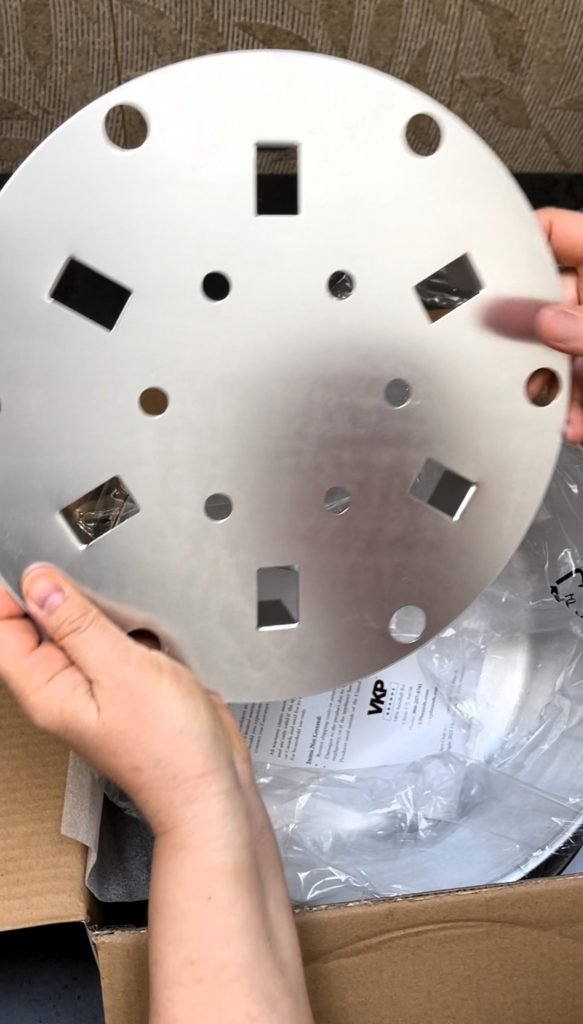
When you get a new FruitSaver steam canner, expect it to come unassembled. Inside the box, you’ll find:
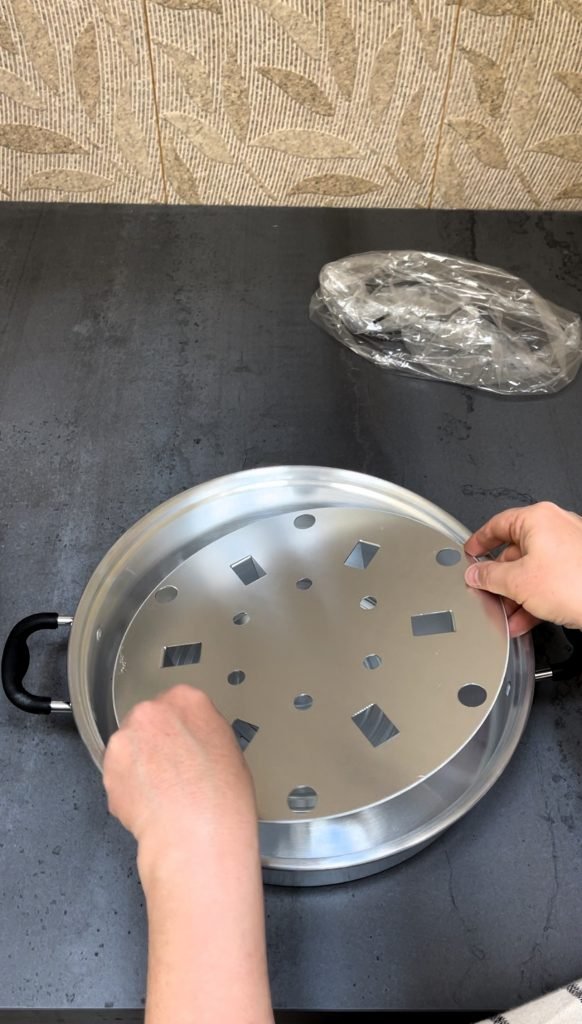
- Aluminum water pan with handles attached
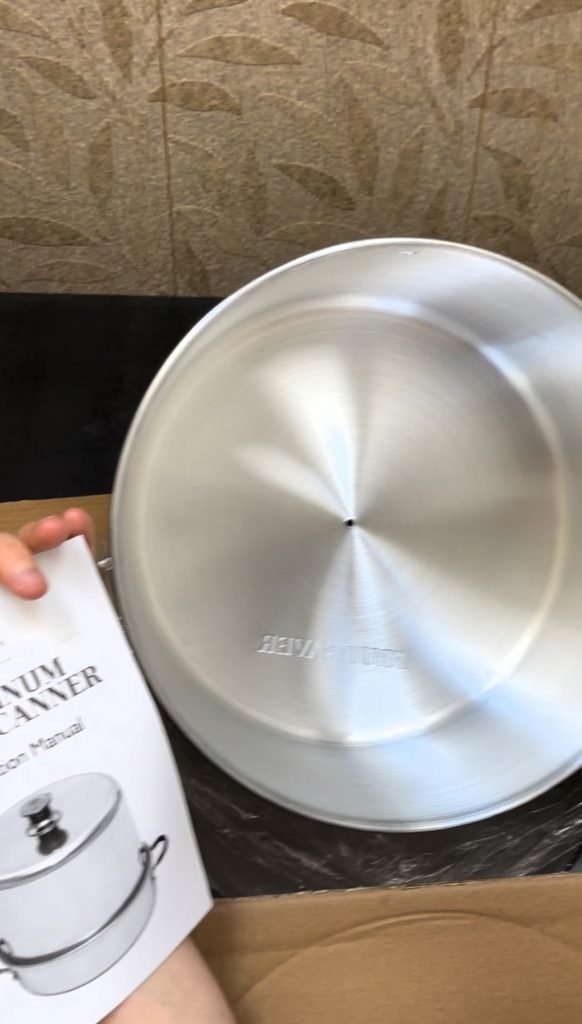
- Aluminum Canning rack, separately wrapped
- Aluminum lid resembling a cloche, without the temperature knob indicator attached, separately wrapped
- The plastic Temperature knob that requires assembly. This one arrives as multiple parts in a single plastic bag marked “indicator knob”
- Paper instruction manual
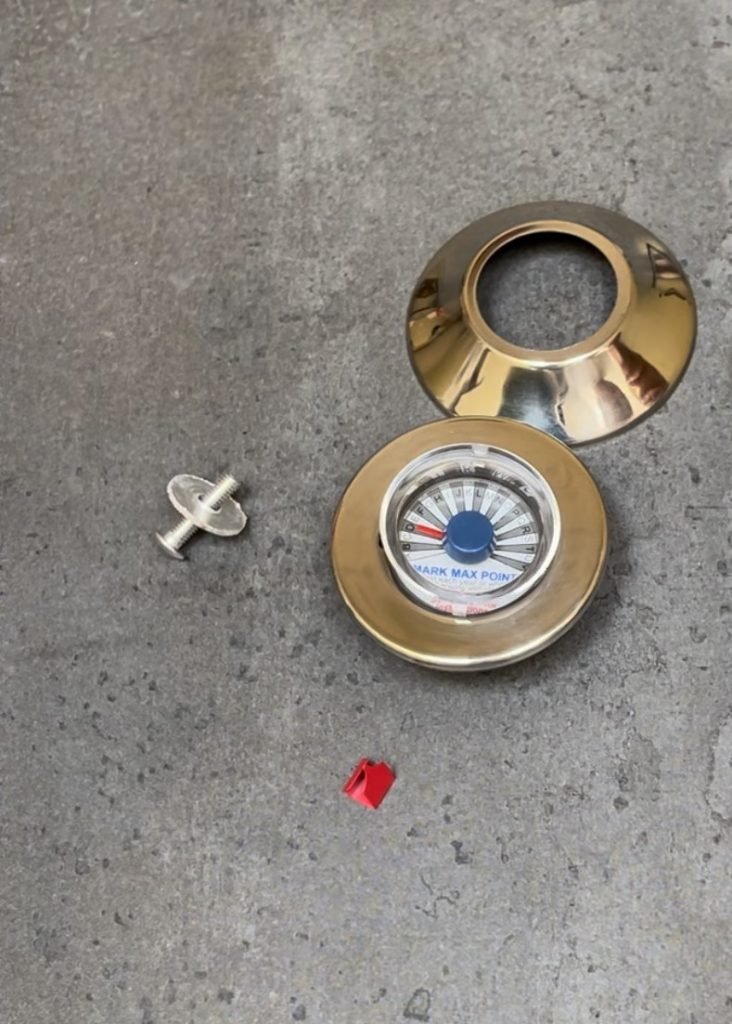
How to assemble brand new Kitchen Crop steam canner
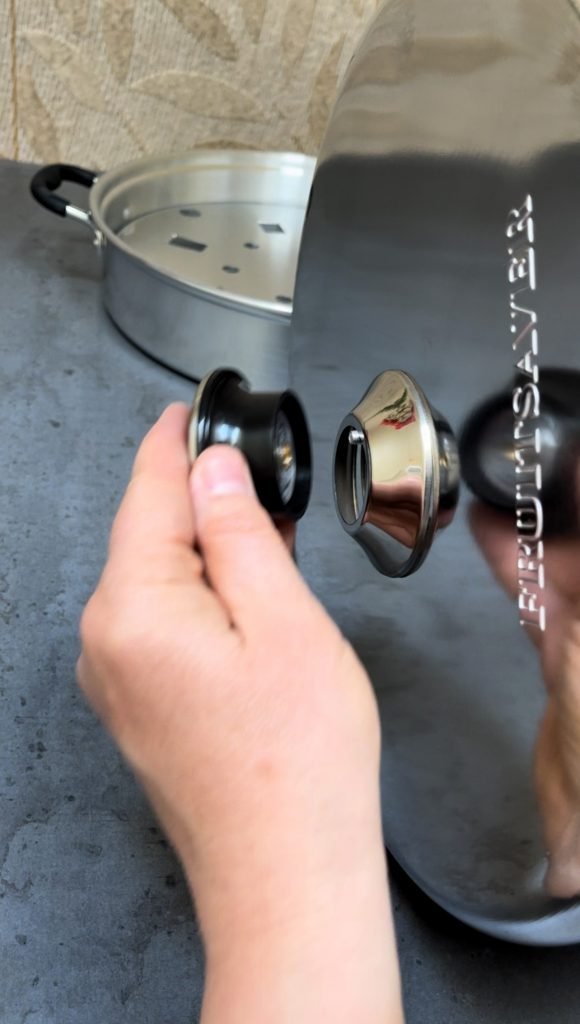
Once you unpack your brand-new Kitchen Crop (Victorio) steam canner, you will need to assemble the temperature indicator and attach it to the canner lid. The instructions make this sound like an easy business, but in reality, you’d have to fidget quite a bit before you finish this step. If you have a helper, make sure to rope them in. Nothing will make assembly easier than a pair of extra hands. We also recommend against following the assembly instructions, because the method they describe does not work that well in real life.
This is how we recommend assembling the temperature indicator:
- Line up the indicator into the ring so notches line up, and the indicator sits flush inside the ring.
- Place the indicator with a ring into a knob and make sure it sits snugly inside. Set it aside.
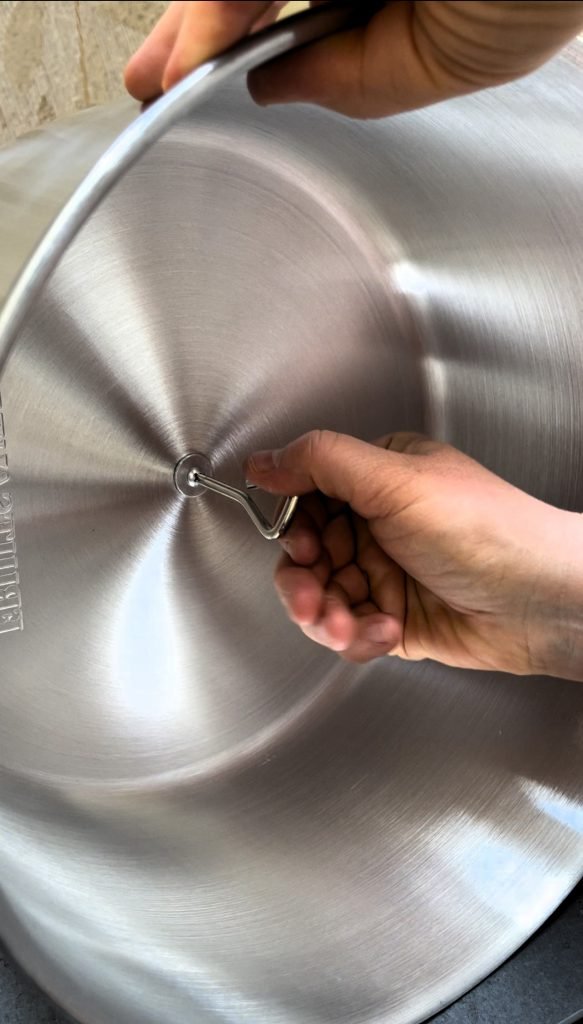
- Place a screw through the washer and put through the hole inside the top of the lid. Set the lid on its side.
- Hang the knob skirt on the screw while holding it by the head inside the lid. Continue to hold the lid on its side.
- Place the assembled knob on the screw and start rotating it to attach the knob to the lid by the screw.
- The moment you can tell that the screw is holding the assembled knob from falling off, flip the lid upside down and, using a screwdriver, tighten the screw even more.
- Hold the knob and continue tightening the screw until the knob stops moving.
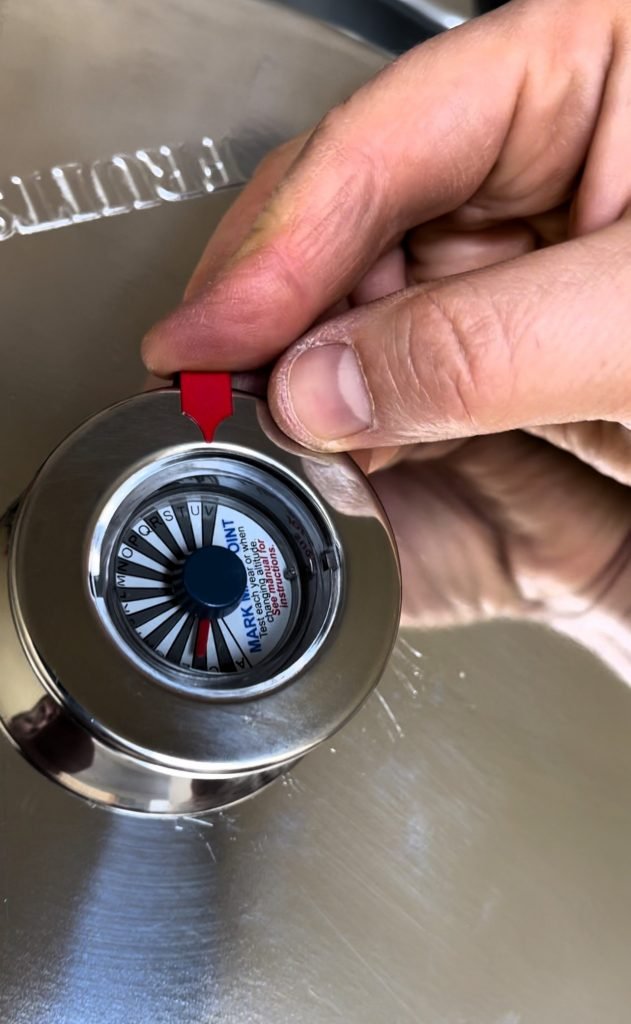
- Snap the adjustable pointer onto the edge of the knob. You will be able to slide it as you calibrate the temperature of your canner.
Next, place the canning rack inside the pan and cover it with a lid. Now, you can proceed to calibrate a temperature indicator of your canner!
Importance of calibrating temperature indicator on a steam canner
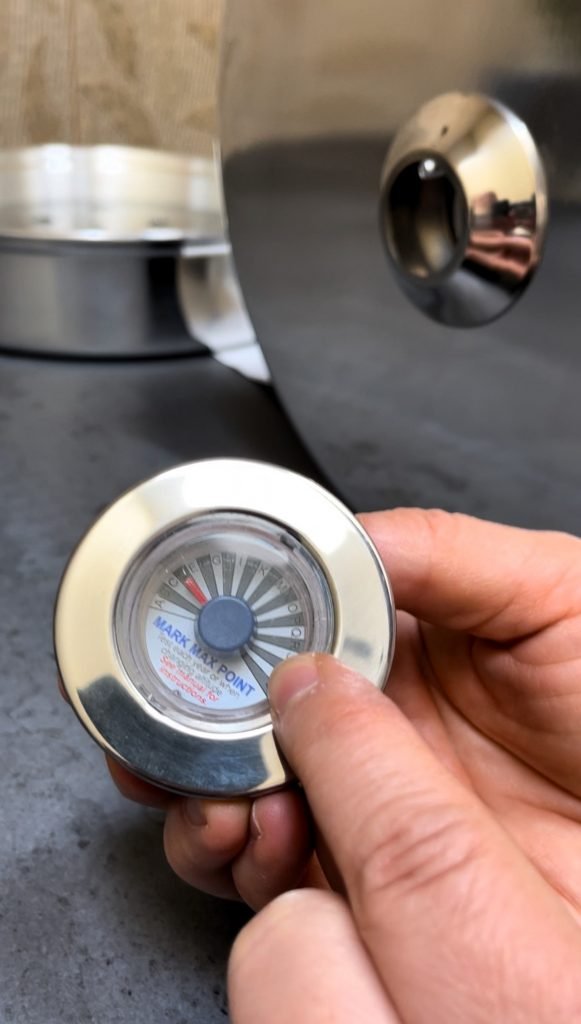
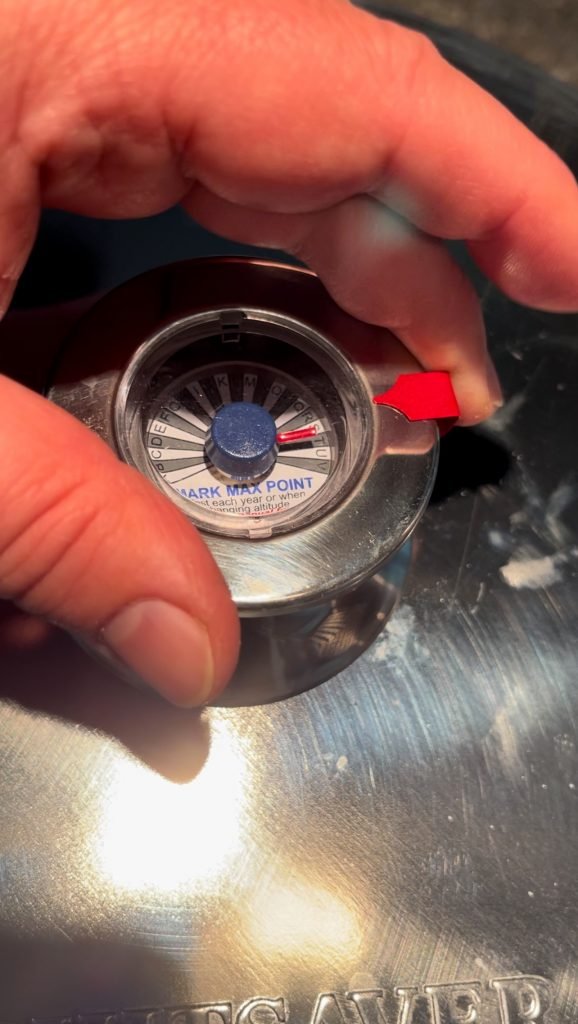
There’s a handy temperature indicator with a moving needle Inside the knob of the Kitchen Crop steam canner. This needle measures the steam temperature inside the canner. As the water boils and creates steam, the needle moves from the left to the right of the temperature indicator. When the canner is full of steam, the needle stops moving. That will be the maximum point for your elevation. Mark this point with an adjustable red pointer that easily snaps onto the knob. Once the needle reaches this spot, start your processing timer!
You might wonder why you can’t just look inside to see if the water is boiling. If the lid were made of glass, you could easily see if the water was boiling and producing steam. However, the lid of this canner is aluminum-made, so you can’t see inside. If you remove the lid to check if the water is boiling, the steam will escape, and the canner will no longer be at the right temperature for safe canning.
How to calibrate the temperature indicator on the Kitchen Crop steam canner
While it may sound complex, calibrating the temperature indicator is simple.
- To begin, fully assemble your steam canner, including the lid.
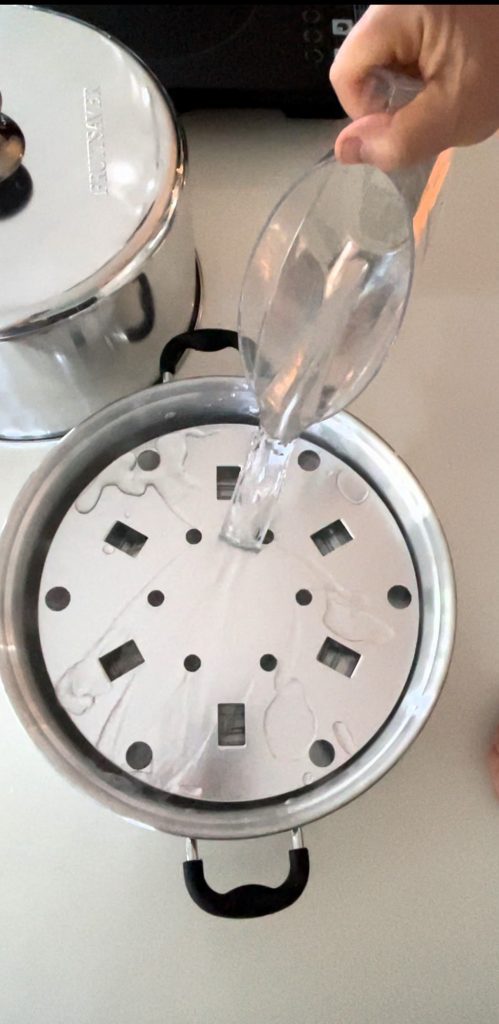
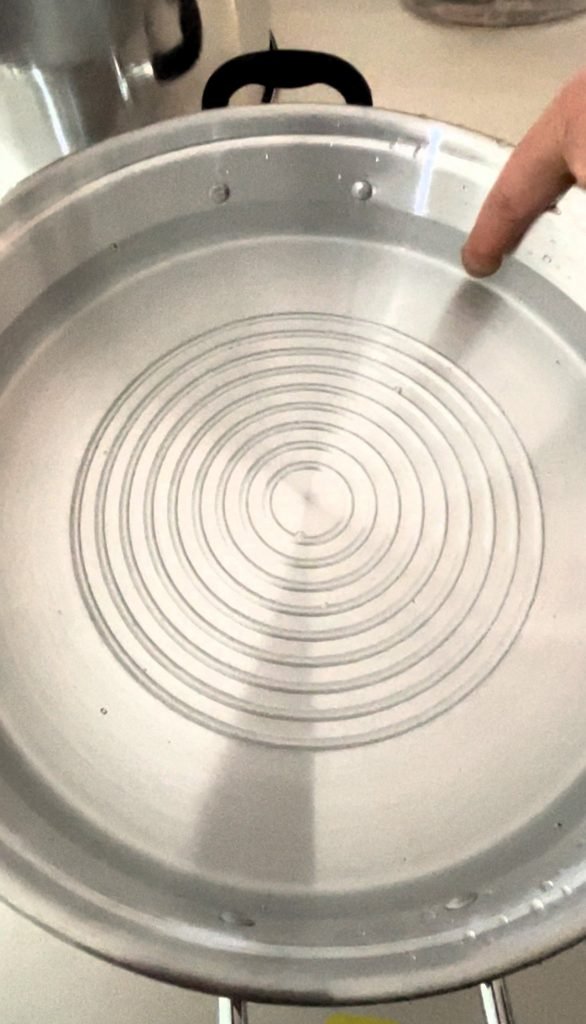
- Then, fill the water pan with water until it reaches the top of the steam canner rack.
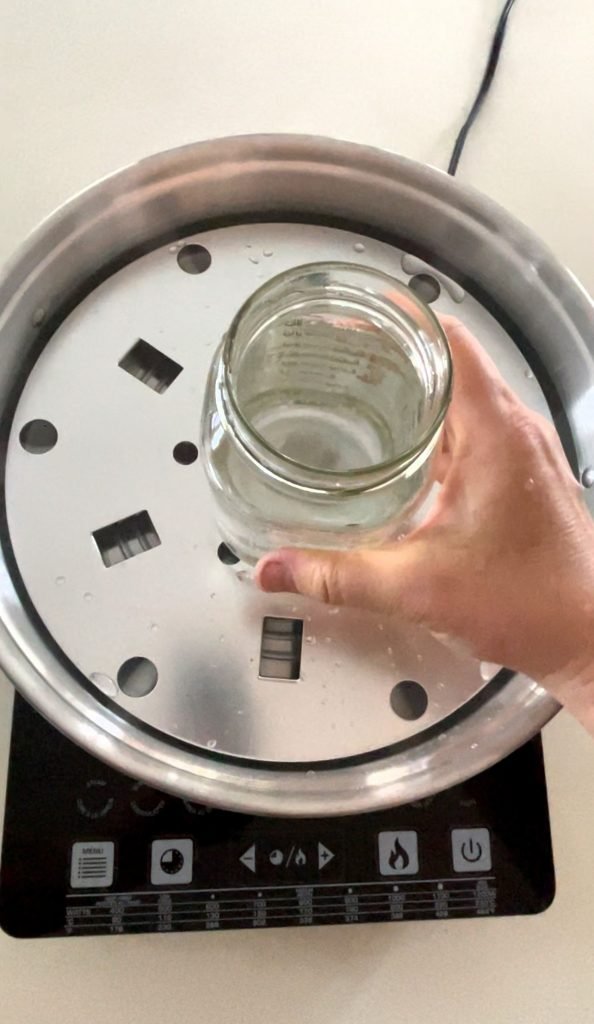
- Place the canner pan on the stove, and select which Mason jars you’ll use for the calibration test. You can use either a single pint jar or four one-quart jars for the test. Fill the selected Mason jars with water. Don’t worry about headspace, and don’t put the lids on the jars. Arrange them on the canning rack and cover them with the canner dome-shaped lid.
- Turn up the heat to bring the canner to a boil. When the canner lid starts to rattle, lower the temperature and watch for the rattling to stop. The steam should only be escaping from the vent hole at the side of the lid.
- Watch the indicator needle. Wait for it to stop moving to the right. Once it stays in place for 10 minutes, you’ve found the maximum point for your elevation. Snap the adjustable pointer onto the knob to mark this point. Make sure to repeat this test when you move to a new home, or if you suspect that the indicator was accidentally moved.
The next time you can your preserves, wait for the needle to align with the pointer. When this happens, you can be sure that your canner is filled with steam and at the right temperature for safe processing.
How to use a Kitchen Crop steam canner
If you have successfully calibrated the temperature indicator of your steam canner, the canning process will be straightforward for you. This is how you do it.
- Fill the water pan of your canner with water until it reaches the top of the steam canner rack, just as you did during calibration.
- Sterilize your jars and prepare your preserve. Always use hot jars in a steam canner, regardless of your preserve pack type. The rack of this steam canner will hold 8 pint jars (500 ml. jars) of 7 quart jars (1 liter jars).
- Preheat the water in the pan of your steam canner. For cold pack preserves, preheat the water to 140°F (60°C). For hot pack preserves, preheat the water to 180°F (82°C). Important to note that for hot pack preserves, the water should be almost boiling but not boiling yet when you place your jars on the canning rack.
- Fill the jars with your preserve, cover them with lids and tighten the bands as you would for the water bath canning. Place jars on the canning rack above the hot/preheated water.
- Place the lid on the canner and heat on high until the canner vents. You should see a full 6-8” column of steam flowing out of the vent holes in the canner.
- Once the canner continuously produces a full column of steam and the temperature indicator reaches the previously marked maximum point (this is why you calibrated the temperature indicator!), start timing the processing time as per your canning recipe instructions. Remember, the processing times for boiling water bath canners and steam canners are identical and interchangeable.
- Once processing time has finished, remove the canner from heat and let it stand for 5 minutes before removing the lid. Remove the jars from the canner and let them cool. Never place hot jars directly on a countertop or any other cold surface.
Steam canning tips and tricks
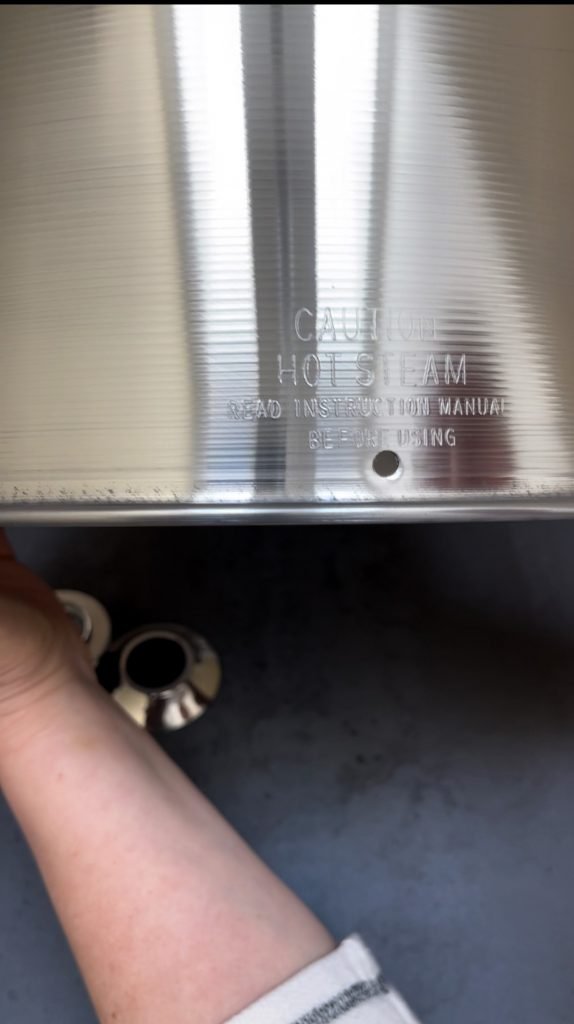
- Be Careful with Steam: The steam coming from the canner is very hot. Make sure to point the venting hole away from you to avoid getting burned.
- Adjusting the Heat: Start with the heat on high to get the water boiling and steam flowing. Once you see a continuous column of steam, lower the heat. You want to make sure that the water continues to boils, but it doesn’t have to boil vigorously. This stops the lid from rattling and lifting. Additionally, this makes the water last longer.
- Using Gas Burners: The manufacturer of the Kitchen Crop steam canner made this line of canners with lightweight aluminum. We were worried that using it on a gas burner might warp the canner, but it held up just fine. If you are using VKP brands stainless steel canner, or using your own stainless steel pot with a steaming inset, this wouldn’t be a concern for you.
- Induction Cooktops: A number of these specialized canners don’t work with induction cooktops. When we tried using our FruitSaver on the induction cooktop, it gave us an error and shut off. Obviously, if you are using a specialized canner or a stock pot designed to work with induction cooktops, this would not be a concern for you. Always find out if your specialized canner will work with your cooktop type before buying it!
- Glass Cooktops: The VKP brands manufacturer advises against using their canners on glass cooktops because it might scratch the surface. We haven’t tested this ourselves, but it’s good to know.
- Preventing Damage: Never run the canner dry. Always fill it to the fullest level with water, no matter how long you need to process your preserves. Running it dry can damage the canner.
- Jar Types: You can use ¼-pint, ½-pint, pint, or quart jars with this canner, but always use preheated warm jars.
What can you can in a steam canner?
In a nutshell, anything you can process in a water bath canner, can also be safely processed in a steam canner. However, there is one important exception: the processing time. The manufacturer advises not to use this canner for any preserves that require more than 45 minutes of processing time. They say that the water in the canner pan won’t last longer than that.
From our experience, lowering the heat, as described in the section above, can make the water last much longer. However, it is good to be aware of the 45-minute recommendation.
You can use this canner for processing foods with a pH of 4.6 or lower. Your preserve can be either raw pack or hot pack, but it must always be filled with hot liquid before you start processing your preserve in the steam canner.
How much does Victorio steam canner cost, and where to buy it?
For those of us who are budget-conscious and thrifty, the big question is always about the price tag. How much do these steam canners cost compared to regular water bath canners? We’ve done the research, and here’s what we found:
A brand new Victorio Kitchen Crop steam canner by VKP Brands costs around $89.99. If you’re okay with buying second-hand, you can find used Kitchen Crop branded or Fruitsaver branded steam canners for as low as $49.99.
On the other hand, a water bath canner from the same VKP Brands tends to be a bit more expensive. A new one costs about $109.99, which is $20 more than the steam canner.
However, if you compare the Kitchen Crop steam canner with water bath canners from other manufacturers, you might find that some water bath canners are priced similarly or even cheaper. Unfortunately, the less expensive water bath canners do not come with a temperature indicator. Currently, VKP Brands is the only manufacturer that makes canners with a built-in temperature indicator.

Keywords: how to use Victorio steam canner | Victorio steam canner | Victorio Kitchen Products steam canner | steam canner recipes | atmospheric steam canner | VKP brands steam canner | Kitchen Crop steam canner | aluminum steam canner | stainless steel steam canner| steam canner with temperature indicator | fruit saver steam canner | steam bath canner | steam canning pot |
Canning Equipment We Use – Honest Reviews & Shopping Links:
Note: Every item we review was purchased with our own money. These posts are not sponsored – just our honest take on the jars, lids, and other canning gear we actually use.
We’ve added curated Amazon links for your convenience. If you buy through them, we may earn a small commission (at no extra cost to you).

