How to Can With WECK Jars (Without any mistakes)
The good news, canning with WECK jars is much like canning with Mason jars: you use the same canning methods - either atmospheric steam canning or water bath canning. The difference, though, is the jar itself. WECK jar comes with a glass lid, rubber gasket, and metal clamps, all of which add a few extra steps to get right.If you've only ever used Mason jars, learning how to can with WECK jars feels different at first. But, once you figure out the steps, the process is quite straightforward. The steps below cover the full process, from sterilizing, filling, sealing, processing, and all the way to testing, so nothing gets skipped.
Ingredients
- 1 glass Weck jar
- 1 glass lid
- 1 rubber gasket
- 2 metal clips
Instructions
- Step 1: Wash and sterilize your jars. Same process as Mason jars (see our jar sterilization guide - link below).
- Step 2: Remove the rubber gaskets from the glass lids and wash them separately in warm, soapy water. Once clean, place the gaskets back onto the glass lids and submerge the assembled lids in just-boiled water (off the heat). Leave the lids and gaskets in the hot water until you’re ready to use them, but for no longer than 10 minutes total.
- Step 3: Fill your jars with preserve, leaving 1 inch of headspace.
- Step 4: Using tongs, lift the glass lid and gasket from the hot water. Place the lid gasket-side down onto the rim of the jar. Secure it with two metal clamps positioned opposite each other. Press each clamp down firmly until it clicks into place on the jar rim. (see our Weck jar assembly guide ).
- Step 5: Process jars in a water bath canner or atmospheric steam canner according to standard processing times. Since WECK jars come in different sizes and shapes than Mason jars, adjust processing times based on the closest equivalent Mason jar size.
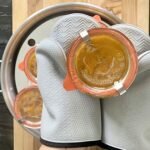
- Step 6: Carefully lift the jars out of the water bath and place them on a towel-lined surface, away from drafts or cold countertops.Do not touch, tilt, or reposition the jars while they cool
- Step 7: Once the jars are completely cool, remove both metal clips. Gently but firmly try lifting the lid by its rim.If the lid stays firmly in place, the seal is successful. If it lifts or shifts, the seal has failed and the jar is not shelf-stable. In that case, refrigerate immediately or reprocess with a new gasket and lid.The rubber tab pointing downward is a helpful visual cue, but it should not be relied on as proof of a proper seal on its own. (See our WECK jar seal guide for more details.)